
Firewalls
Place a Server Behind a pfSense Firewall
In this example we will demonstrate how to utilize the CaaB platform to setup a network between two servers and a pfSense virtual firewall appliance.
- Create a terminal server or VDI or a group of servers you wish to network. Please refer to the documentation on how servers are created or email your Technical Account Manager for assistance.
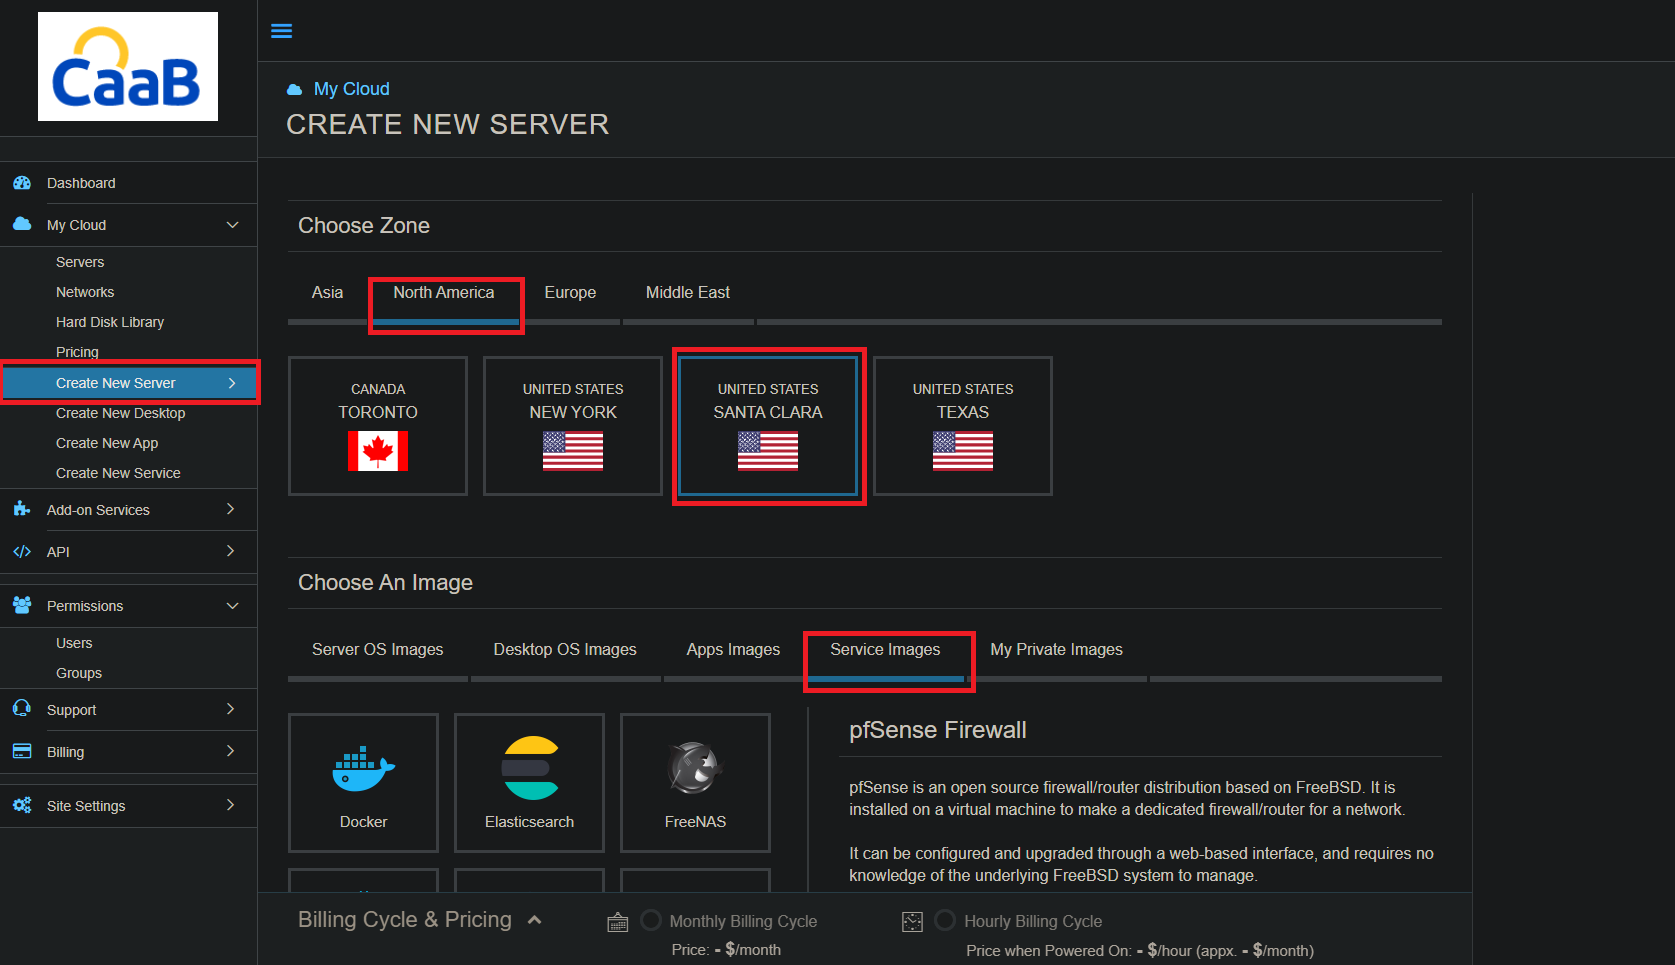
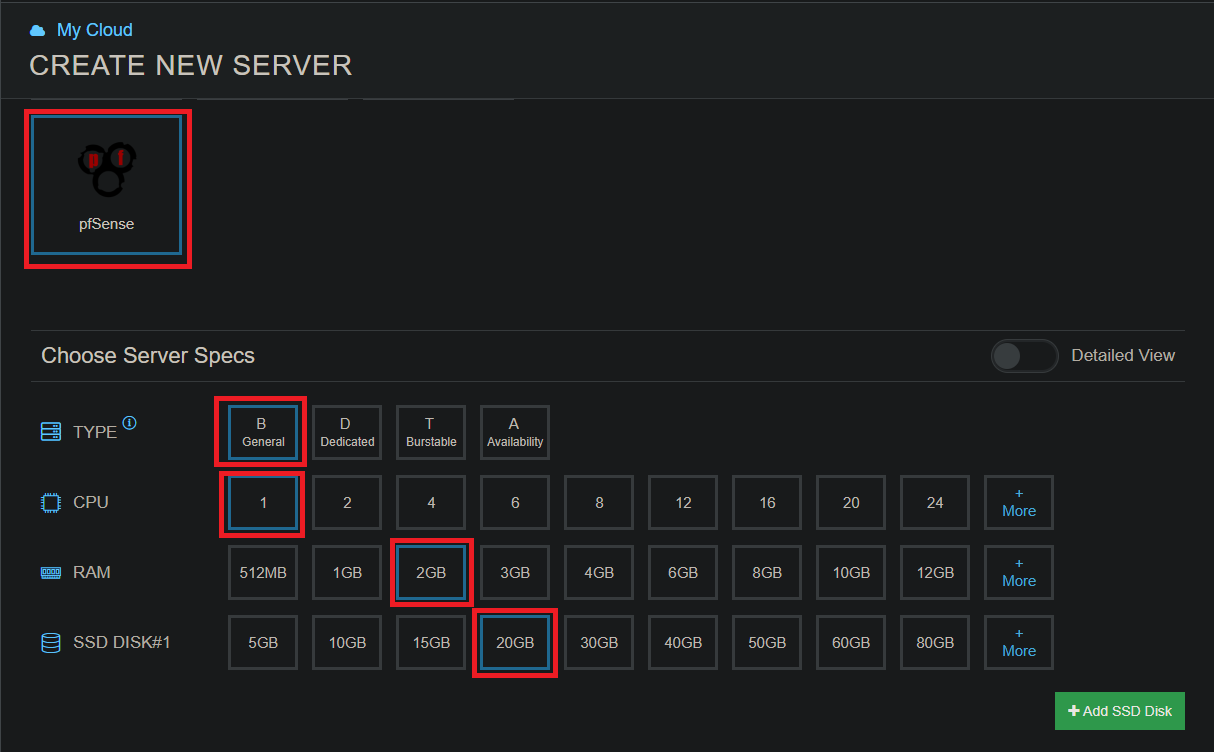
- Create an instance of pfSense. Ensure the firewall is located within the same datacenter as the servers to be networked. “Create New Server” > Choose “Zone” > Choose “Datacenter” > Select “Service Images”.
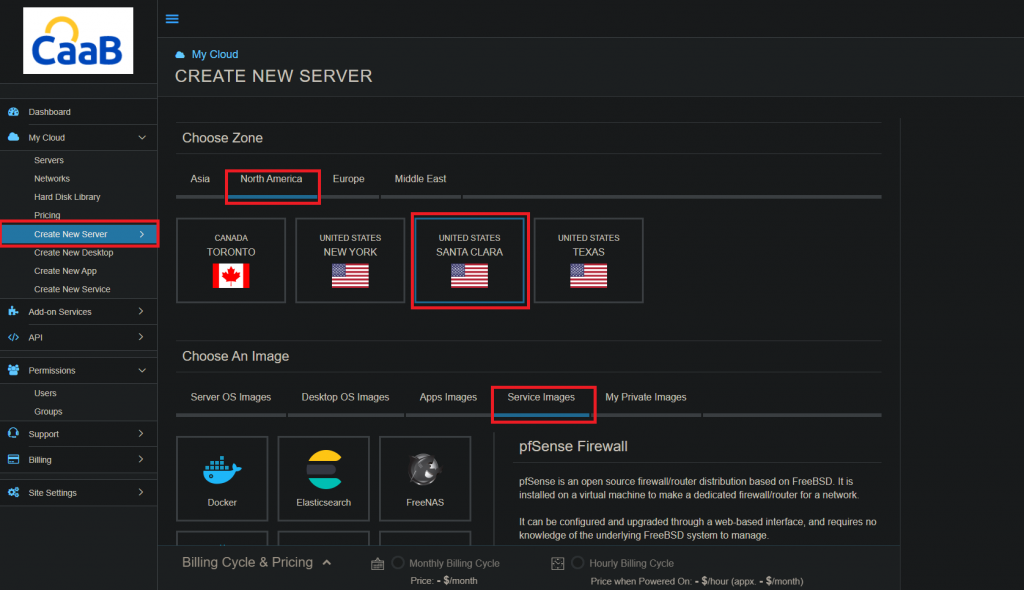
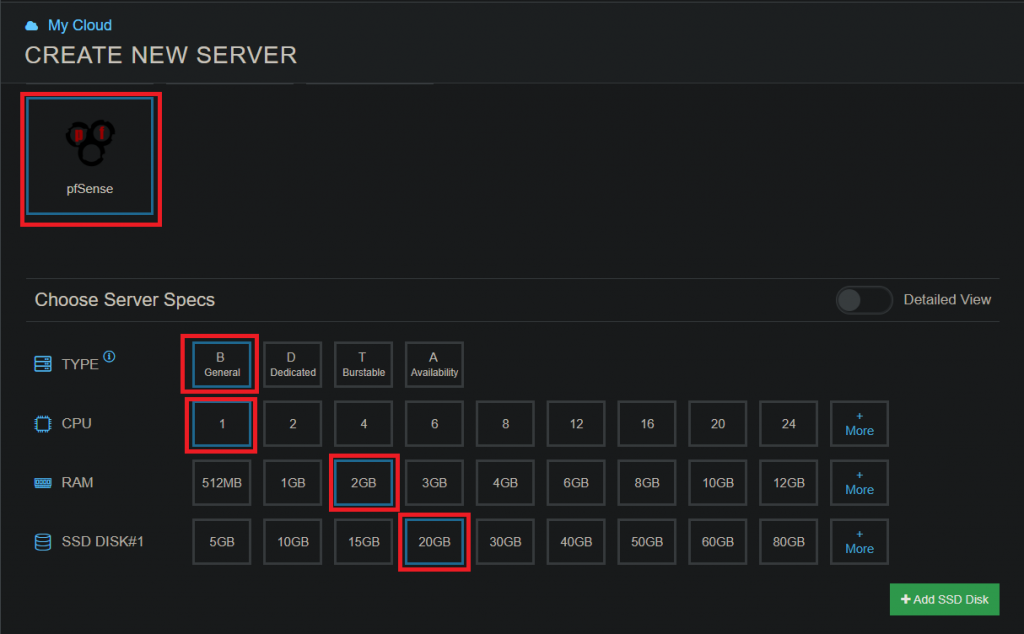
- Scroll through the “Service Images” options and select “pfSense” at the bottom – select the latest version. Choose server specifications – General > 1vCPU > 2GB RAM > 20GB DISK.
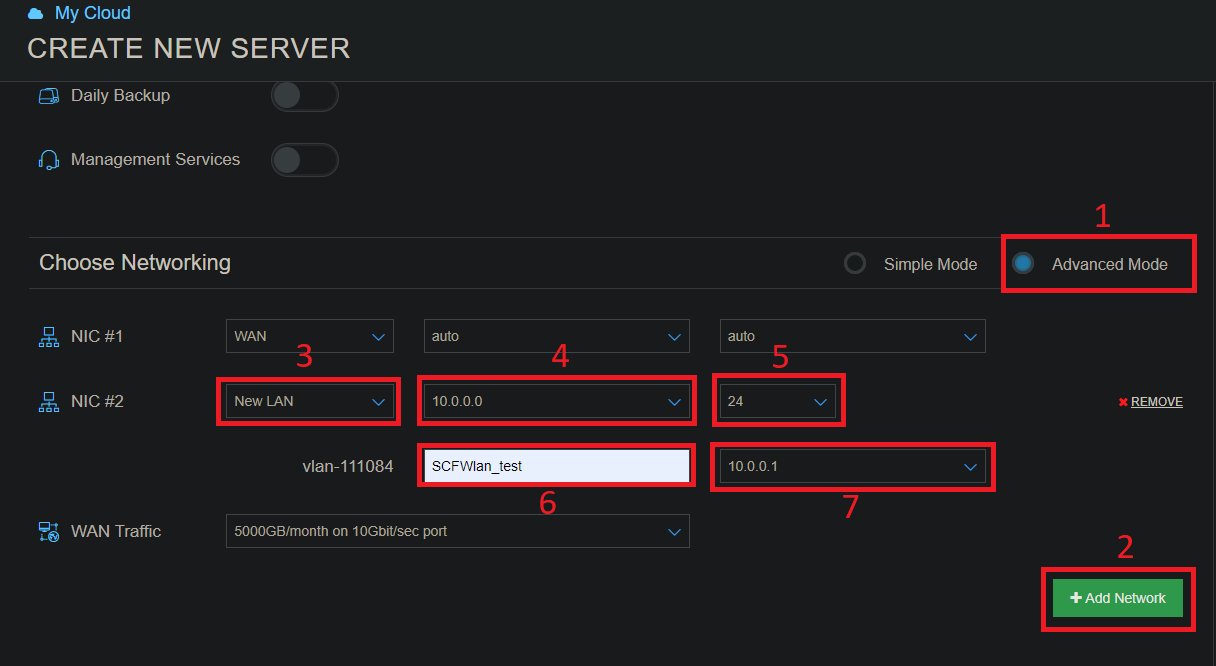
- Choose Networking: Select “Advanced Mode”.
- Select “Add Network”.
- From the “LAN” dropdown menu within NIC#2 select “New LAN”.
- From the “Select Subnet Address” dropdown select your desired subnet, then select an appropriate prefix from the “Select Prefix” dropdown.
- Enter a name for this network and select an IP address.

- Scroll down to “Finalize Settings”. Input a server name and appropriate password. Choose the “Monthly” billing cycle.
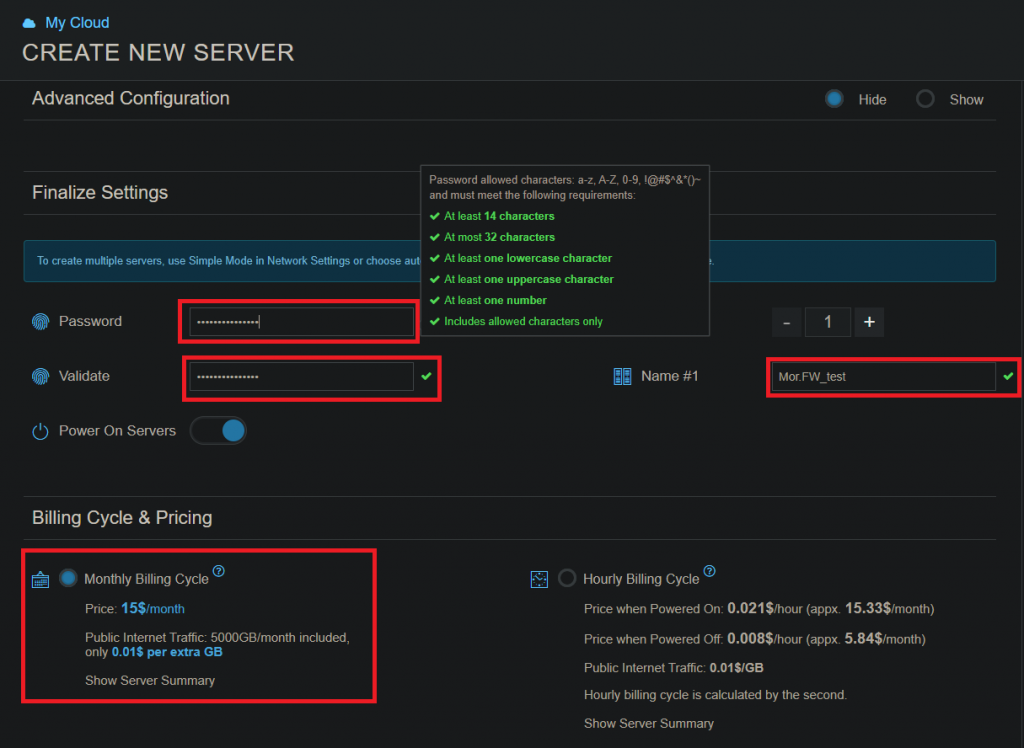
- Select “Create Server”.
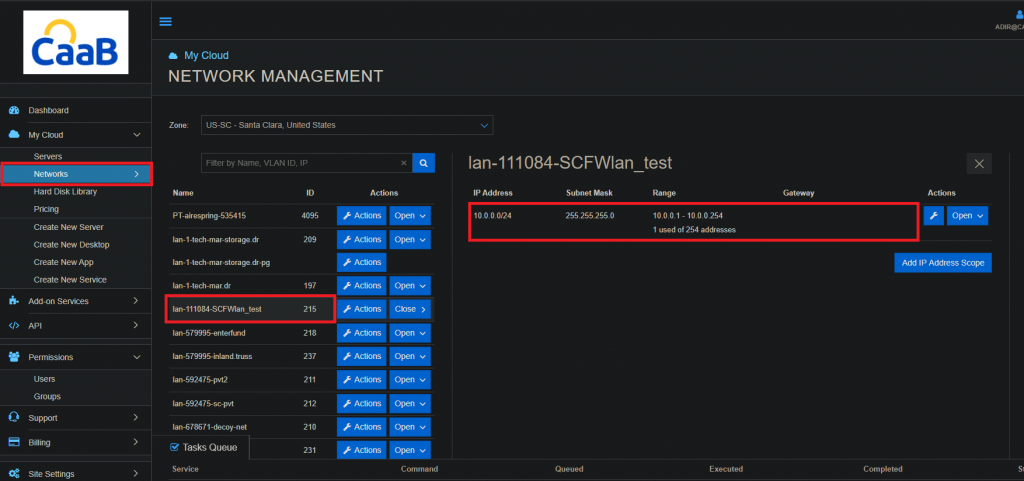
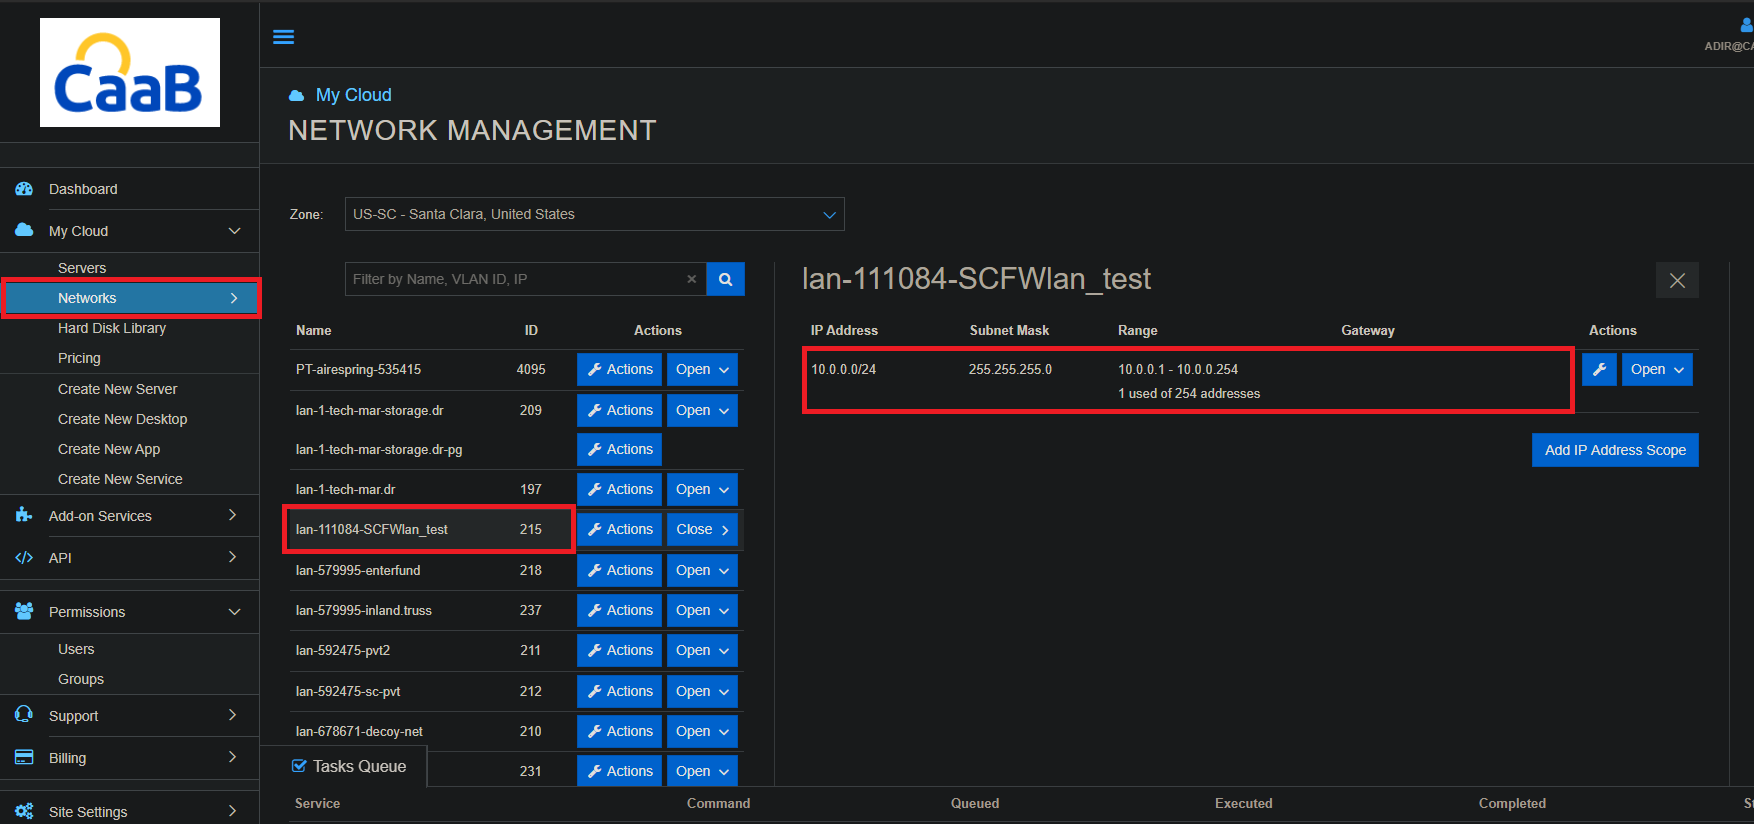
- From the administrative panel on the left side of the screen select “Networks”.
- Locate the network created while making the pfSense appliance.
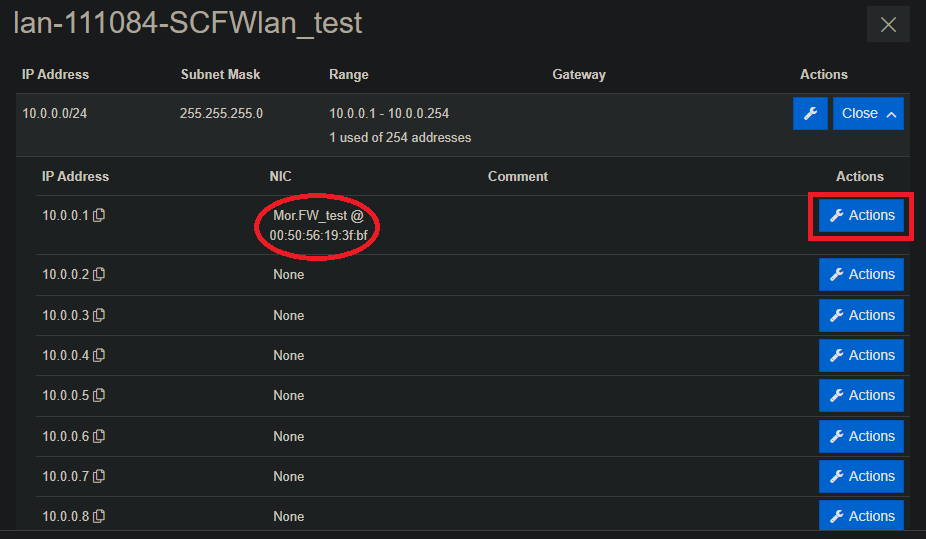
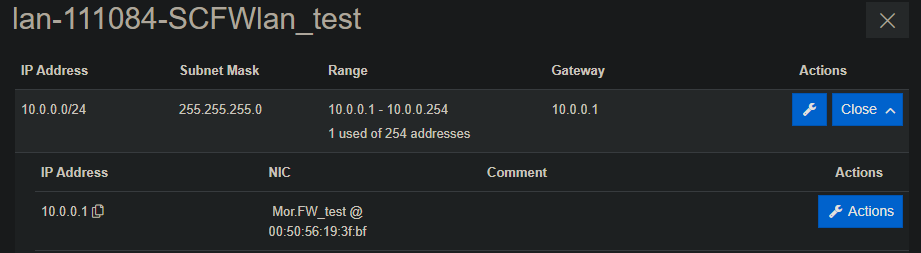
- Select the network to reveal IP assignments.
- In the IP assignments list you will the pfSense firewall. Next step is to assign this firewall as the Gateway. Select “Actions”> “Clear”.
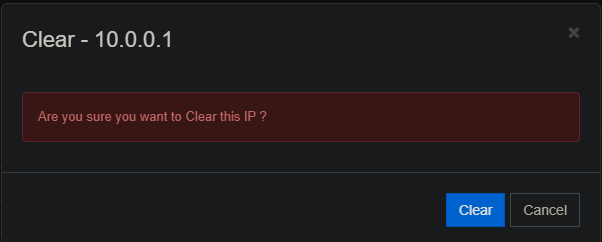
- Confirmation will appear – Select “Clear”. This frees up the IP address so we can assign it to the Gateway, which we will then assign to the firewall.
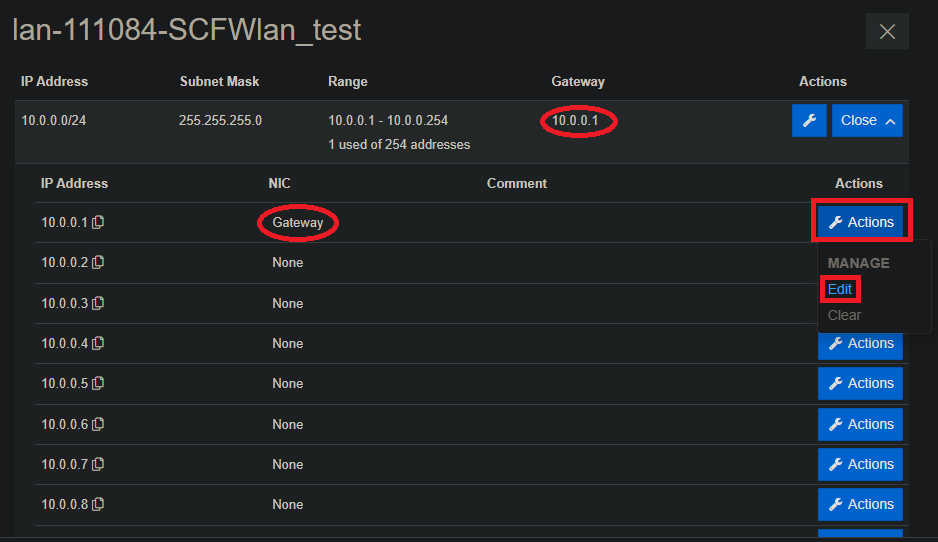
- Once clear, select “Manage” > “Edit”.

- From the Gateway dropdown, select the IP that was once associate with pfSense. Select “Update”.

- Note the Gateway has been assigned. Select “Actions” > “Edit”.
- From the NIC dropdown select the pfSense server, then select “Update”.
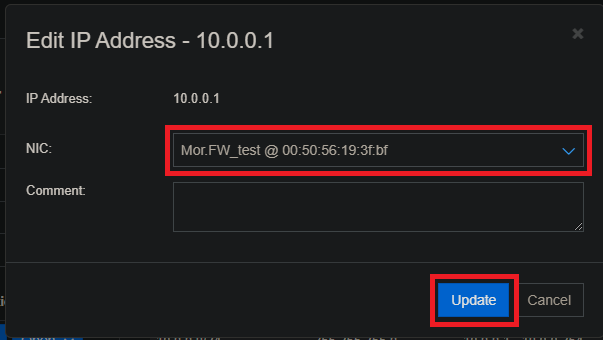
- pfSense has now been successfully assigned to the Gateway.
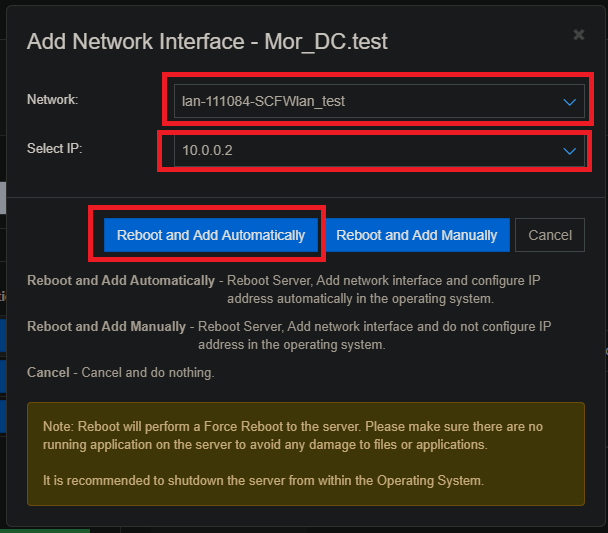
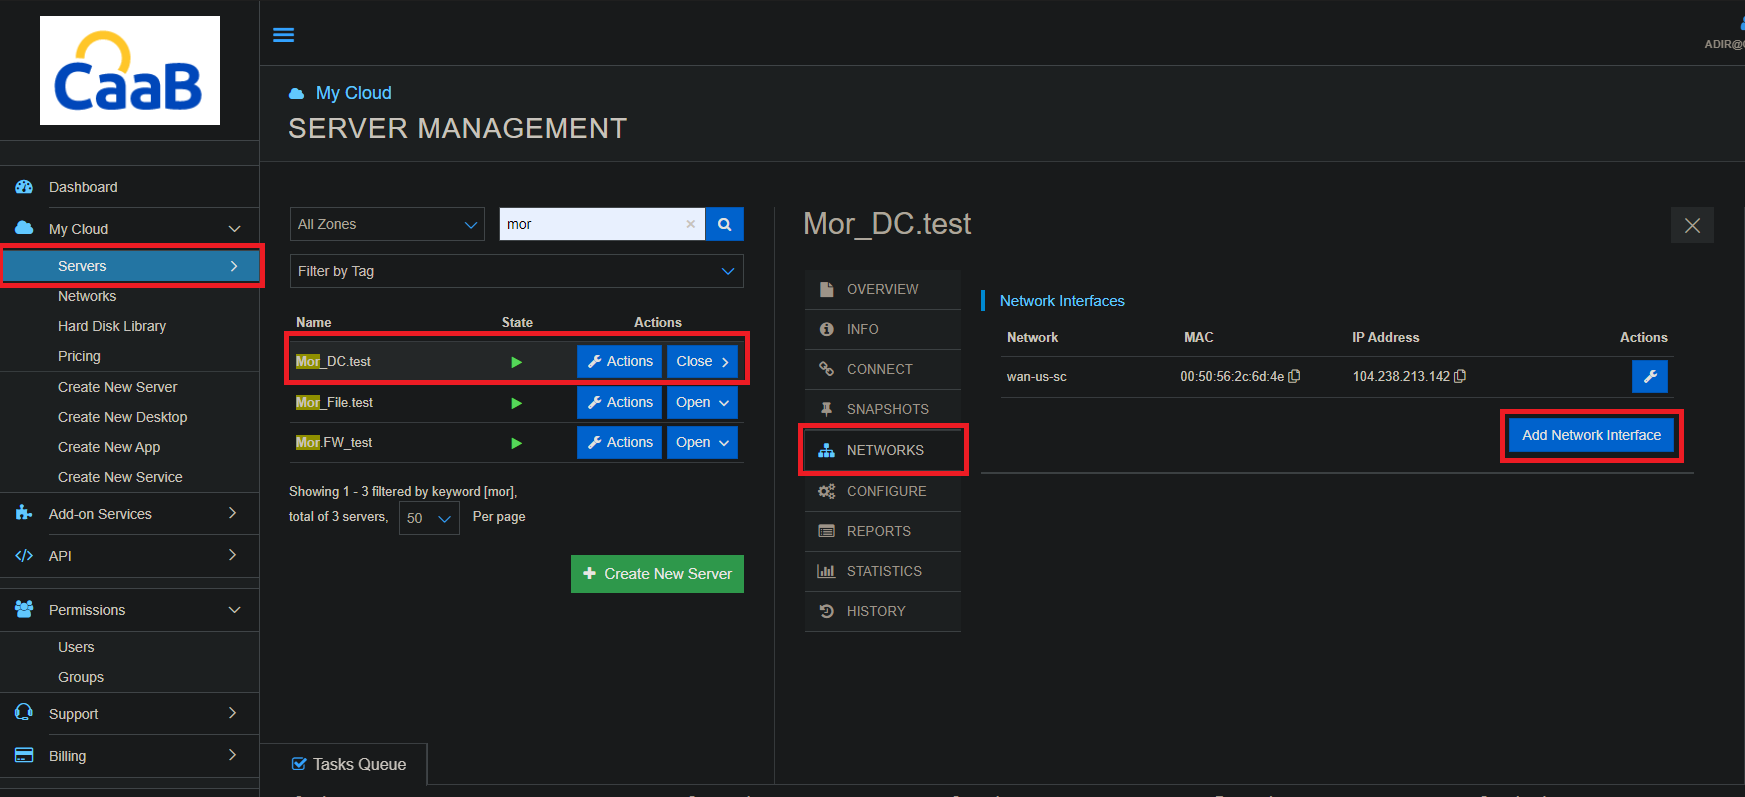
- Navigate back to your terminal servers to finish creating the network. Select the “Server” > “Networks” > “Add Network Interface”.

- From the “Network” dropdown select the network assigned to you pfSense server. Then select an appropriate IP from the following dropdown. Select reboot and add automatically. Repeat this process for any additional servers.
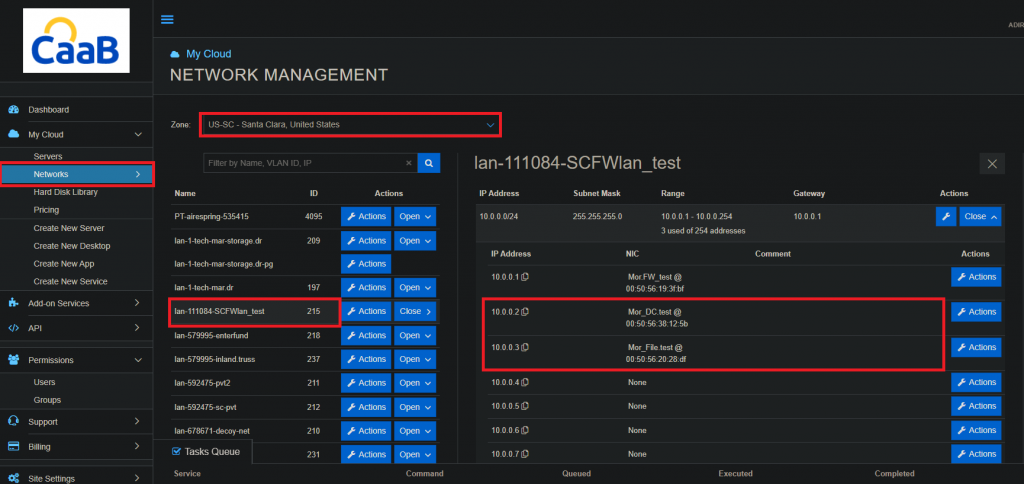
- Return to “Networks” > “Zone”. Select your network from the list and you will see confirmation your servers have been assigned successfully.


Technical Support
[email protected]
347-892-4733
Sales Inquiries
USA
646-558-2225
Canada
647-243-8771
Strategic Partnership Opportunities
[email protected]
Become a Reseller
[email protected]
