
Users, Groups & Permissions
Group Management
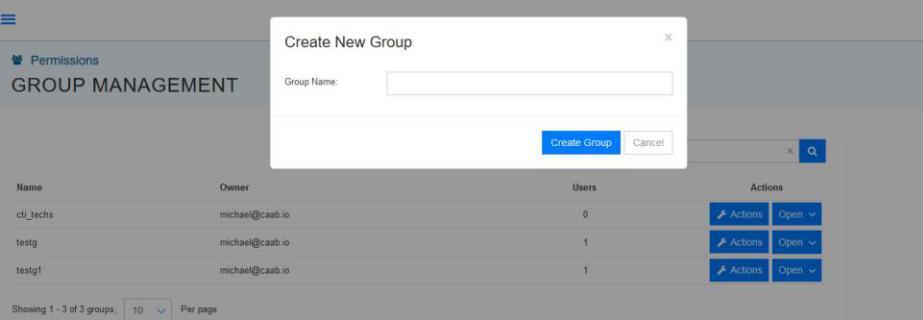
Creating Groups & Assigning Group Permissions
Simplify server administration by creating groups and assigning users.
- From the administrative panel on the left navigate to “Permissions” > “Groups”.

- Select “Create New Group”.
- Choose a descriptive name for the group, then select “Create Group”.
- Select the recently created group.
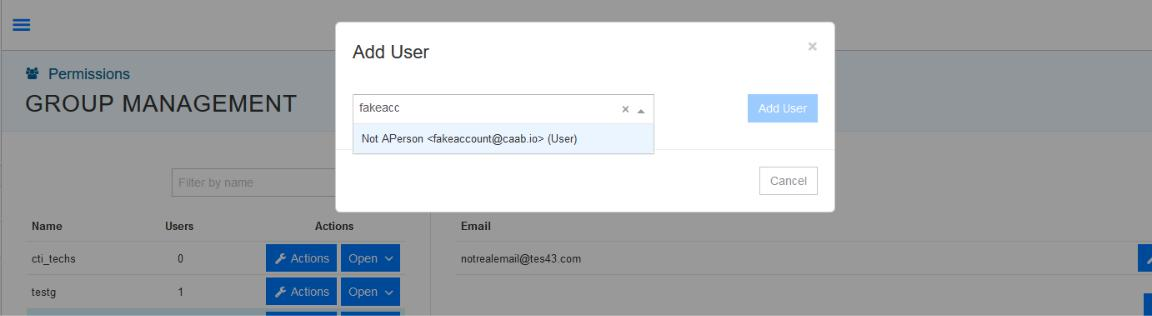
- Select “Add User”.
- Input the name or email of an existing user and select “Add User”. Repeat for additional users.

Adding/Removing Users from a Group
- Go to the “Groups” tab of the platform, which can be find under “Permissions” in the left panel.
- Click the “Open” button on the group you want to add users to
- Click “Add User”.
- Removing users is done through the “actions” button under that user’s name when you have the group selected.
Assigning a Group to a Server
- Go to the “Servers” tab of the platform, which can be find under “My Cloud” in the left panel.
- Click on the “Actions” button of your desired server and select “Permissions”.
- Type in the name of the group you’d like to assign to that server.
- Select only “Access” permissions for basic viewing and or both “Access” and “Configuration” permissions for full control.
Technical Support
[email protected]
347-892-4733
Sales Inquiries
USA
646-558-2225
Canada
647-243-8771
Strategic Partnership Opportunities
[email protected]
Become a Reseller
[email protected]
